Malifaux Crew - Seamus and The Red Chapel Gang

"There's no problem that cannot be solved by throwing a few dead hookers at it."

Malifaux Ressurectionists - Seamus and the Red Chapel Gang
That quote, allegedly from one of the Malifaux developers, caught my attention.

I was in the mood for something different, something new and something I could get on the table and play quickly without spending a vast amount of money on it.

Malifaux seemed to fit the bill perfectly. Card-based mechanic, scenario driven and low model count. Victoriana-Steampunk-Horror-with a dose of Wild West and the entry cost was low; awesome-hobby-sauce!

The fate decks are superbly flavoursome.
Without any clue as to what sort of tactics I might favour with any crew, I did what the sensible hobbyist does.

I browsed the pretty figures and chose the ones that made me go "Oooooh perty!"

I settled on Seamus Crew Boxed Set: The Red Chapel Gang, a fate deck and a copy of the updated small rules manual, all from Arcane Miniatures. The rulebook is well laid out and easy to read but worth noting it doesn't contain any background or fluff.

For a change, I actually missed the fluff
The models were a little awkward to assemble and I broke the end off Sybelle's riding crop. With no hope of re-attaching it I had to model something from scratch, it ended up a little too bit, but it won't be breaking off anytime soon.

The crew took about 3 sessions to finish and they first saw action a few weeks back.

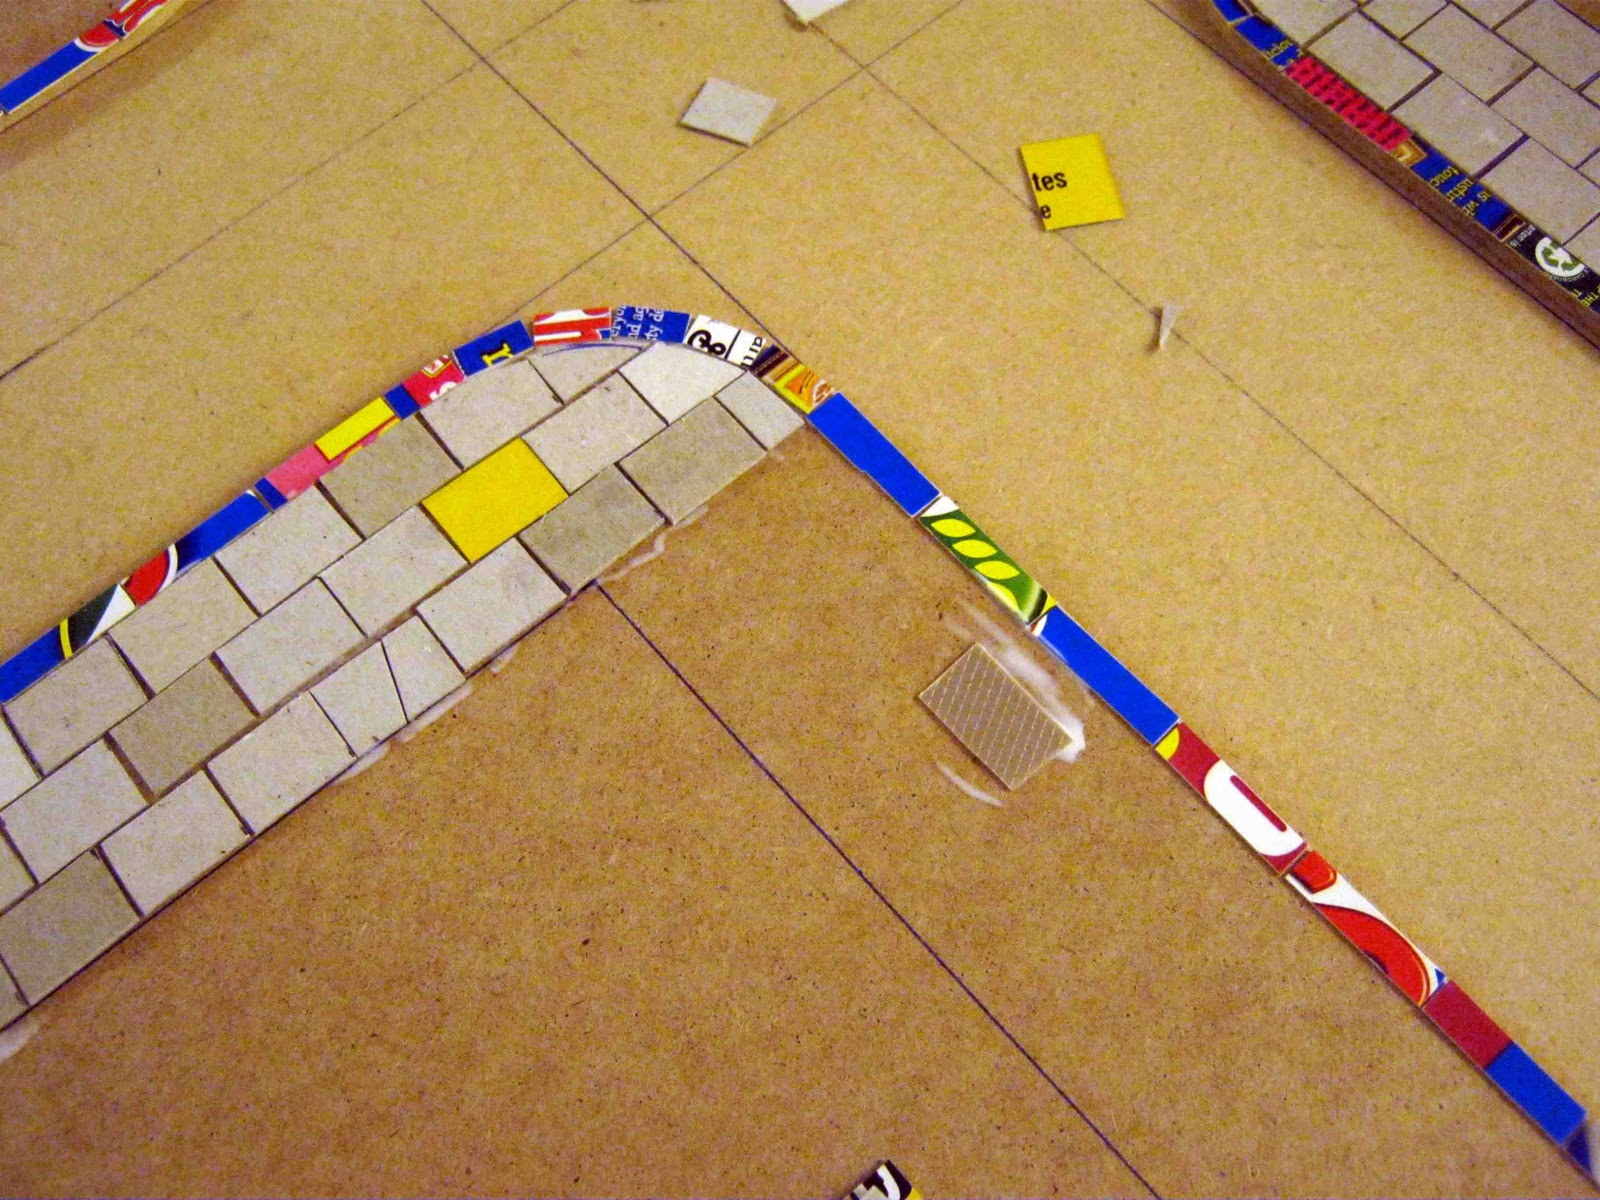
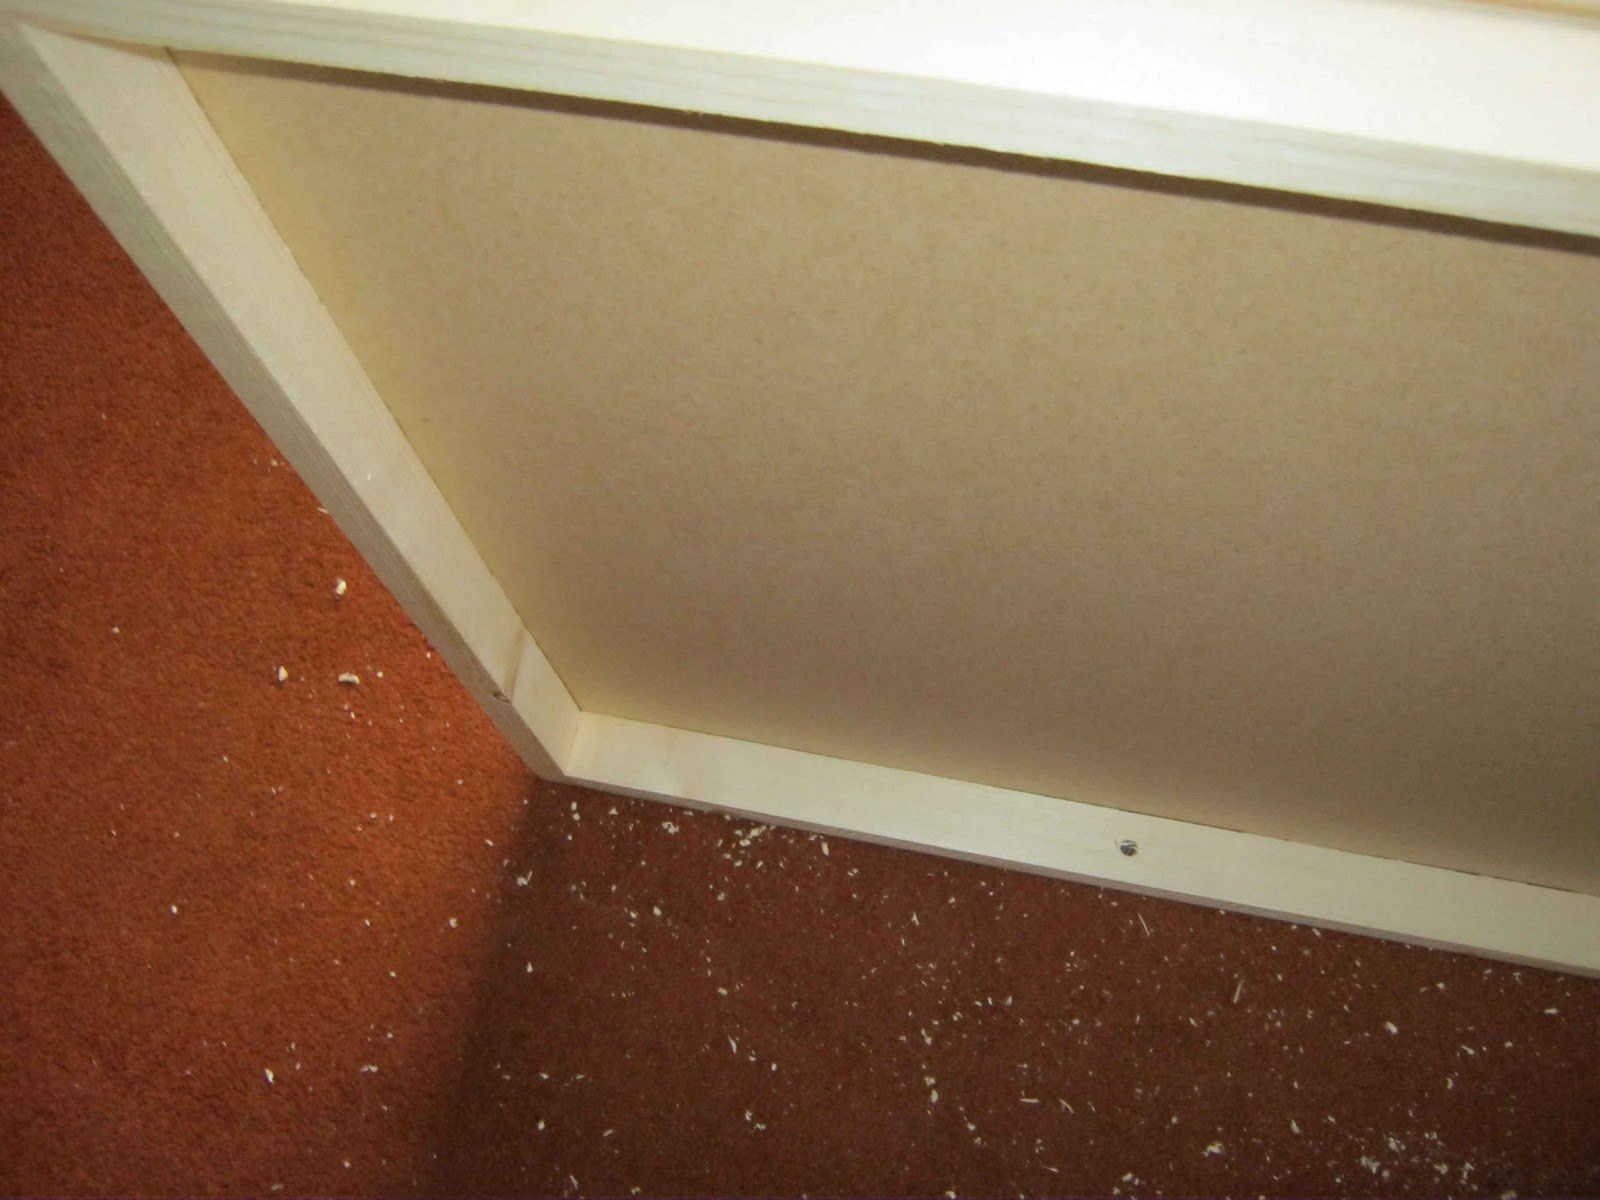
The bases are miliput and I have a battened 3'' by 3'' board ready to model in a similar style.

First impressions of the game are great. Easy to learn mechanics gain depth when characters combine abilities and 'trigger' enhanced outcomes and the scenario-driven gameplay means there's not always a stand-up fight leading to a tactical, though-provoking exchange rife with cunning and shifty looks as you figure out what on earth your opponent is trying to achieve. AND... there's zombies in it! :)

Poor undead ladies got macerated by mechanical Shelobs!
I'm sold on it and plan to model the game board later this year before picking up a few new additions to the crew.

Outbreak City: How to Build a 28mm Zombie Gaming Table - Part 4

With the show looming and with TONS of work still to do I kinda knew I had to knuckle down and get the 'texturing' stage finished. You can play All Things Zombie on any surface really, but once I had the vision in my head, I just had to make it a reality.

I was working away from home during the week whilst this project progressed, and I wanted to get this to a 'ready-to-paint' stage before going  away again on the Sunday night.

Rather than lock myself away in the man-cave, and miss out on my family, I commandeered the living room on Saturday morning and set about moving things forward whilst the family caused even more chaos all around me.

The texturing progressed.
Whilst I was 100% behind this method, I couldn't help wonder what had really let myself into.

Cutting out squares of card for something small is one thing, anyone who has scratch built a slate roof knows that by the time you hit the second half the novelty diminishes, but this, as simple as it was in principle, was something else.

Perhaps I had over-estimated the time it was going to take... maybe... perhaps... erm... yeah... I did. A lot.

Minutes rolled into hours and daylight vanished. By the time everyone was tucked up into bed I put a little backgorund inspiration on.

Resident Evil flowed into Night of the Living Dead and as the credits rolled on Dawn of the Dead a little face appeared at the top of the stairs.

"Were they being chased by monsters Daddy?" Whoops, error.

My daughter was a awake and quite possibly scarred for life. It was around half three in the morning and I still had loads to do if I wanted to get a sealing coat of paint into the boards. I should be taking her up to bed again and settling her down.

"Can I help Daddy?"

I need all the help I can get, and my daughter; a hobbyist? Epic.

"Yes please." I confessed.

My other half woke up a few minutes later. For some inexplicable reason, none of us could sleep, so, perhaps in sympathy, an army of cardboard engineers marched onwards.

Cardboard Engineer Reinforcements - 3.30 am. Thank you guys - I love you.
Not only was the help appreciated but with three people sticking the tiles down, things progressed ever more rapidly. We finished the boards by the time the sun came up and thankfully, we all hit the sack, exhausted.

One of three 2' by 4'  sections.
On an easy Sunday filled with lots of sitting down quietly, pancakes and copious amounts of strong coffee I headed to the garage and sealed the edges of the boards and the sidewalks.

Sealing the main detail on the board, and the sides of the battens, with MDF Primer.
So far so good. Perhaps more of a 'How NOT to' guide for this stage, but after a close call the project was back on track again.

To be continued...

All Things Zombie


Random Encounter 1 - Scratch Built Ork Stompa

Following a huge amount of support from fellow bloggers I'm going to throw in a few random encounters These random encounters will include some of the non-zombie stuff I've been creating over the past few years, either just before or alongside the Outbreak City project.

Well badly Mech!
I recently discovered that Warhammer 40K had it's 25th Anniversary. That sounded like quite a cool landmark until I realised that it meant I had been playing 40K for 25 years; Yikes!

Ball point pen Supa Rockets!
As an Ork player who has never owned anything but Orks so, quite frankly, I'm not that good at 40K and haven't really developed any strategy other than a massed assault. GW got me into this hobby so despite me playing a whole heap of different games now, I still play 40K and LOTR occasionally.

Belly plates. Sigil is off the original Stompa.
Sat in my bits box for a number of years was the interior of a small waste paper bin which my buddy James said "You should make than into a Stompa." It seemed like a good idea, but I guessed a scratch-built Stompa would require quite a bit of work and whilst my bits box was full, there wasn't quite enough Orky Stuff.

Titan Close Combat Weapon - GW, Lego and other bitz.
With the introduction of Apocalypse, and the super-heavies, the Orks were blessed with one of the coolest Orky models ever, the Stompa. I picked one up and after struggling to build it (It isn't the easiest kit to build, but it looks good) I found they had very kindly included a few optional accessories. The excuses had to end, I now had the Orky bits I needed to scratch build another stompa.

Big Shoota turret.
The model progressed with polystyrene being parcel taped to the waste paper bin to build a basic frame with a layer of papier-maché on top to give a solid base for everything else to come.

Da bit dat makes da smoke and noise!
The feet were cardboard tube 'legs' with Hirst Arts blocks and for everything else I raided the bits box and tried to replicate GW's Stompa as closely as I could.

Ork pilot, otherwise known as a Stompa-er.
Cardboard and plasti-card 'plates' were glued onto the papier-maché with individual rivets super-glued in place. The head was a deodorant cap with stuff stuck on. Cannons, shootas and rockets were made from everything from pipes, to pens, to bits off an old star wars toy - essentially all the best junk out of my bitz box. I used spare goblin and Ork figures and one I'd saved from the original Stompa.

"We will fix it, we will mend it!"
It took quite a bit of time to finish and being a model for a GW game, enter scale creep (it ended up bigger than intended), but all it does the trick.

Shoulder plate courtesy of Darth Vader's Tie Figther circa 1980 something.

We tend to work on 'secret' projects for our 40K Apocalypse games so that there can be a big reveal come gaming day (a tradition stated by James), and this one was fun to deploy.

That's what I call a Deth Kannon!
And I couldn't post this without a comparison shot. Mummy on the left, completely scratch built. Baby on the right; GW's kit, with a few bits missing, used on mummy.


If 40K is your thing here's a video from a 40K Apocalypse game played in the Man-Cave back in May 2010, 7000 points per side. The two Stompas see action side by side.


Next time, we return to the construction of Outbreak City for my All Things Zombie campaign.

"Tidy your Man-Cave"

Do you ever get that feeling that you need a clear out?

After a massive amount of recent hobby time spread across several different projects at once the mess on the workbench finally got the better of me.

Spot the Project - If you dare?
With the second half of an unfinished a match of Blood Bowl and a try-out of Dust Tactics planned for yesterday and another Blood Bowl match, 1st try at Malifaux and another Dust tactics planed for next weekend I finally had a clear out of the man-cave and now I can actually see the gaming table.

Blood Bowl was great, despite a 2-0 defeat and Dust Tactics' fast-paced and uncomplicated gameplay sits perfectly with me, and... there's zombies in it!

Whilst The Lead Will Walk The Earth is a zombie gaming blog, and I mostly play All Things Zombie, if you fancy seeing anything else I'll happily post some choice zombie 'Diversions' if there's interest.

The sun is coming out; time to kiss SADS goodbye and start undercoating outside again.

Happy Hobby Days.

28mm Umbrella Corporation SUVs

Back long ago in the summer of 2011, Matt over at Too Much Unpainted Lead dropped me an email to say. "I saw what looked like a 28mm scale Hummer in Poundland the other day, they'd need a re-paint but they looked pretty good in your All Things Zombie games. Do you want me to pick you one up?"

Umbrella Corporation - Our Business is Life Itself.

"Three please." I replied and he duly emailed to report he'd purchased them up and he'd bring them over next time we got together.

Military Affairs? The General's Daughter in 28mm?

Weeks, then months, went by when every time we met I was greeted with "Damn.", then "Shit!", then "Bugger!" and finally "Bloody-fecking-arse-monkeys!" or something to that effect.

Just before New Year we played a French Indian War skirmish in 54mm and at last, Father Mattmass delivered three shiny new Hummers.

When you buy it and paint it right away it doesn't count. So I cracked right on with them right away.

From the outset I had the idea of 'company' vehicles, something to go with my Hazmat Squad and to fit with some planned military types. So a subtle but blatant use of the Umbrella Corporation logo seemed appropriate.

I unscrewed the chassis, took out the windows and seats, and simply re-painted with matt acrylic spray-paint, using plastic primer on the interior piece. I wasn't expecting any wear on the interior, but you never know about the paint sticking to that kind of plastic.

I gave the body of the Hummers a coat of satin varnish and printed re-scaled liveries and fixed them to the doors with Pritt Stick.

I am really pleased with how they turned out, especially considering the price and ease of conversion, as they took less than 2 hours over two evenings to complete.

Umbrella Corporation Cavalry?

Thank you Matt.

Outbeak City: How to Build a 28mm Zombie Gaming Table - Part 3

Part 3 of the construction of my All Things Zombie Gaming Table.

Start at the beginning to read the whole article.

With the raised sidewalks fixed onto the battened boards is was time to go about detailing the board.

The whole philisophy behind this gaming table was detail. The idea was that every inch of the table was treated like an individual figure base, so I felt it was important to avoid shortcuts wherever possible and 'do it for real'. With that in mind I went about cutting out individual paving stones and curbs to ensure the sidewalks would take dry-brushing and ink washes.

"It's Begun!" It was about now I realised how much time this might actually take. 

The curbstones were cut 2/8'' wide and 1'' long. On the corners I switched to 1/2 '' lengths to aid with the curve.

I painted about 10-12'' of PVA at a time as I lay the tiles.
You can just about see the cuts made in the underside of the sidewalk pieces to help define the drainage. I was working away from home for a couple of months whilst I was doing this, so most of the build was done when I came home at weekends but I was able to cut out the tiles during weeknights.

Undercuts, to represent storm drains.
The sidewalks themselves consist of three rows of 6/8'' by 4.5/8''.

Like most gamers, I am a hoarder or all things that 'might be useful one day' so I had a fair amount of card sitting ready to be used. However, to ensure that there was some 'real-world' variation in the paving, to represent replaced slabs, ground heave or gentle localised subsidence, I wanted variation.

For the most part the curbstones were cereal packets and the paving was mostly the type of card that comes in a box of 5 reams of A4 paper (one at the top, one at the bottom) with of different thicknesses card randomly mixed in.

Drain cover, added with checker-plate plasti-card.
On the corners I simply alternated long and short edges to follow the line into the curve and trimmed the edges of the tiles as I went. That gave me a flat edge to work from again.

The tiles were all laid in a basic bricklaying 'running bond' style, offset by half a tile. I deliberately left a small gap between every tile, so that they were not laid exactly flush and a coat of textured paint wouldn't obscure the edges of the tiles.

I added a few random 'broken' slabs, by simply cutting them in half of in thirds at appropriate looking angles.

Finished curb and sidewalk.
To be continued...

All Things Zombie


28mm BMX Bandits

Like a few other fellow bloggers I've been having difficulty with blogger this last week, guessing it might be an i.e. and hope to be able to sort that out this week. So a short post and deviation from my All Things Zombie gaming table posts for now.

Enjoy the little things, they say. Well some of the things I enjoy really are quite little.

My good friend James, who knows I am on a quest to fill Outbreak City with all sorts of awesome 'stuff' picked me up these BMXs for my birthday. In his words "I thought they'd look great just lying in the street." Thank you James!

The red bike and the blue bike had a race.

If you buy it and paint it right away it doesn't count...right...and if someone else buys it for you and you paint it right away, even better.

I always wanted a Raleigh Burner.
What I got was a Grifter instead.

These 28mm scale bikes are available from Black Cat Bases, as well as all sorts of other fantastic street-filling detritus, junk, bottles, cans and other waste that I can't wait to get my grubby little mitts on. Well worth checking out.

Outbreak City - How to Build a 28mm Zombie Gaming Table - Part 2

Missed part 1 of this article?

Part 2 of the construction of my All Things Zombie Outbreak City gaming table.

Once I had three identical 2' by 4' battened boards. I lay them side by side and marked the roads and sidewalks.

Measure twice. Draw once. Check, correct and re-draw.

To accommodate tollerances (and my shoddy woodworking) I swapped the boards around as I went, to check that they lined up on every side.

A note on road sizes. I opted for a four inch (10.2 cm) road width, the same approximate size as World Works Games roads, as it strikes a good balance between aesthetics and playability when trying to retain a city-block feel to the table.

Once I was comfortable the measurements I cut to size the second layer sections in 3mm MDF. Being above the level of the roads, this level would represent the sidewalks and hard-standing of the city.

Note: No round corners yets.

I laid out all the sections to check everything was going to fit ok and once I was sure it was within acceptable limits, I cut curves of the top layer into the corners with a jigsaw.


This was also the stage I added a few dropped curbs and cut small notches in the underside of the top layer to represent storm drains. In retrospect, to go the extra mile, I would have cut the storm drains a little deeper and routed small holes in corresponding locations in the sides roads to match.

Finally I fixed the curbs to the base-boards with PVA and, after leaving it to dry for a few days, marked two inch sidewalks onto these sections.


To be continued...

All Things Zombie


Outbreak City - How to Build a 28mm Zombie Gaming Table - Part 1

So, I'd agreed to run a display game at the Eastern Front Wargames Show last year I wanted to make sure the gaming board looked very much a part of the whole set up as I could.

Outbreak City at Eastern Front 2011 - Unfinished, but the foundation is there.

I take most of my 'new toys and figures' photographs on a 2' by 4' section of city board I build a few years back and for games, I use a 4' by 4' board built for a Lord of The Rings 'Shadow and Flame' campaign. Fine for getting the project off the ground and getting some games in but I really wanted to create a new gaming surface dedicated to Modern Zombie gaming.

All Things Zombie is normally played on a 3' by 3' table but to ensure the game didn't look out of place in the context of a big hall next to other large-table games, I decided on a 6' by 4' layout.

Inspired by this EPIC teaser shot from The Extraordinarii and I had a good idea of what I was after. 

The Extraordinarii's amazing 'Small Town USA' layout.
The devil is in the detail on this board: modelled surface with 3D detail, raised curbs, recessed roads, sidewalks and man-hole covers, street furniture, signs, stop-lights, telephone boxes and varying textures and colours. I love the fact this table is quite light and eventually, those are the shades and tones I am after.

I trimmed some A4 paper to scale and began sketching and after a few calculations I set off to the local hardware stores, B&Q and Homebase here in the UK, to buy some timber.

They conveniently sell 6mm MDF in 3' by 4' sheets, and I selected 38mm deep softwood to batten the sheets.

One board down.

I created the batten frame and everything was glued and screwed with all every drill hole counter-sunk.

The batten frame.

I only have one old drill, on a cord, so I had to switch the drill bit and counter-sink back and forth, using a chuck-key for every individual drill hole. My advice; buy or borrow a paired cordless drill set (that's my future plan) and have them set up ready, it will save loads of time.

3 completed base-boards.

Something that bugs me about modular gaming tables is when you accidentally knock them (and I tend to do that) and they shift out of alignment.

To stop this I drilled holes through the battening in every side so that the boards could be fixed together.

Guide holes for linking the boards.

I used a slightly larger than necessary drill bit for these holes to accommodate for unevenness in the boards and my inability to measure drill holes correctly. It worked out fine.

Wing-nut.
They are attached with bots and wing-nuts.

Bolt head.
An extra bit of time and thought, but well worth the effort to avoid player created earthquakes.

To be continued...

All Things Zombie