60 Minute (times roughly 6) Makeover

With city development fully underway the interiors of Outbreak City’s buildings were looking rather bland, empty and lifeless (but not in a good way). Time for a lilliputian Llewelyn-Bowen touch.

I don’t currently have a vast range of interior items to fill the buildings that are done, let alone the others planned. The Ebbles archive DVD is on its way which I am reliably informed contains some great interior items I can’t wait to get started on. I began with something simple and chose a single storey unit – a generator service and repair shop. This was also the first building I cut the doors and windows from.
Luxury swag - result!
As Vampifan has commented, each additional step in a build adds to the total build time and adding an interior is likely one of the most significant. This simple interior took a few evenings. I am glad I chose something this small as I am now have realistic expectations on the time required for the larger ones.

I added a partition wall to create a backroom and split the retail space and a workshop area. The walls were painted (I’ll try to use more printed textures in future) and the shop unit floor is a Google search for tiled floor textures. The image was re-sized and tiled to fit. The workshop floor is simply coloured paper, cut to size.

To fill the rooms I relied heavily on the superb freebies from TommyGun and re-scaled items from Jim's Dolls House Pages (more in a future post) I selected some shelving units, a workstation with keyboard and monitor. I added a wall clock, a welcome mat and a few boxes. I was mindful that the space had to be playable but needed enough interesting touches to create the illusion of a real place. I am happy with the current status but it deserves another session’s work. I would like to add a couple of generators in the retail unit and one on a workbench out back with some oily stains on the workshop floor among other small details.

Zombie free - time to snaffle generator spares!
Yup, I know - something is missing. Almost every building should actually include toilets, washbasins and a separate sink, somewhere to make drinks in a commerical unit or a kitchen in a residential property. I'll look at including those in future builds, when I have some models to make up for them.

I am guessing that replicating porcelain thrones over and over again might be a bit of a pain in the proverbial but perhaps it will help keep in mind rule # 3. Beware of Bathrooms.

Geek-Chic Zombie Couture

A broken camera forced me to re-think this entry. Hmmmm? Colin's comment on my first post reminded me to revisit the idea of what to wear to make your zombie gaming experience all the richer, so here goes.

With the popularity of zombies in entertainment growing faster than a re-make runner the opportunituies to show your Zombiephile status on your chest are growing rather favourably. There have always been the more obvious movie tie-in Tees, but here is a small selection that are more chic than geek. So, what are you waiting for? Get yer zomb on!

Andy's Gun Works from Nerdoh
Rule #2 - Absolute T-Shirts
Zombrex - Gamerprint
Nuka Cola - Gamerprint
Survival Kit - Teenormous
4 Player - Teenormous

Crossroads Mall - Teenormous

Girls Med Kit - Think Geek

Dead on You - Dusty Shirt
Zombie Hunter - Zazzle
Chainsaw - All Zombie Shirts
Shotgun - All Zombie Shirts
RE Shotguns - Stylin Online
RE Biohazard - Stylin Online
RE Umbrella Corp - Stylin Online
Go Frank! - Nift Shirts
Go check out these other awesome must-have Zombie T-Shirts.

Zombtropolis

Pulling together less than half a dozen buildings wasn’t exactly going to provide a highly flexible gaming environment representing Outbreak City for my All Things Zombie games. I knew that to create something more than just the small town feel that I was going to have to get my hobby face on.
I continued with what I had, among others I added another WWG flat from Downtown Mayhem, this time adding a removable roof so that I could add an interior in the future and I also progressed on to more buildings from the Mircotactix range and even doubled up on one, changing the signs to represent a hairdressers (inspired by Dead Rising Case Zero).

Downtown Mayhem - with removable roof

Microtactix - Re-signed Deli

With inspiration from Vampifan’s interiors I decided to try my hand at removing the windows and replacing with the coloured plastic filing sleeves. Quite a challenge, especially with foam core. As per Vampifan’s comment on a previous post, this took considerably longer than just skinning a foam core box. I made a few simple changes to the build process, such as printing the edges of the foracore in dark grey, so that I could either leave it bare or it would mask mistakes more easily if I was skinning the tops of walls.
Mayhem Biege Brick - This will have the first interior
A little more on MircoTactix stuff - The Twilight Street Basic Urban Environment set is available for $20 and the Urban Buildings Expansion for $15, if card buildings are your chosen route and you are looking for some interesting variety and have access to an A3 printer, they are well worth taking a look. Following on from my previous post, if you don’t have access to an A3 printer, they also produce a Twilight Street Heroic Scale range. Further note to my last post, their free download of Horseman’s Deli is in Heroic Scale and therefore prints onto A4 with no need for scaling.
Their Strip Club and Pawn Shops were fun and the second was a larger building than some of the previous ones. However, I noticed that as the buildings got taller it was going to be more problematic to fit and play in interiors on the ground (1st in USA) floor.
Microtactix Voodoo Jake's - Opens at 11:00am
Microtactics Pawn Shop
In response to this problem I moved into a MicroTactix apartment and sliced the top floor off, building it as a separate unit so it would be easy to build and use the interior.
Microtactix Apartment

Microtactix - Apartment dismantled
My favourite Microtactix build so far is the Twilight Street Expansion Set Theatre, the largest footprint of my buildings so far, it was a fun build and the addition of the all zombie movie posters was an obvious cliché too good to miss. I am looking forward to the interior of this one.

Microtactix Theatre
Slowly and surely the set was coming together and there was now enough for me to play my first game of All Things Zombie in a few years, a quick brush up on the rules to get me back into the feel of things. There was however something missing. The streets seemed remarkably clean and uncluttered and I felt it was time for some street furniture and other urban terrain to give the place a more lived-in (or died-in) feel.
Things didn't look good for Shaun, cheesefeast aside.

Marconi Plays The Mamba

Mullets and moustaches are no place to hide from the raging hordes of the undead and my internet research revealed that most zombie gaming terrain was, unsurprisingly, not built on Rock and Roll but was based on printable card terrain, plastic railway buildings or scratch-built masterpieces. After finding the incredible ZombieTown initially thought I was going to go down that route but the discovery of Vampifan’s Blog revealed the wonders of printable terrain and I figured I would be able to put a play set together a lot quicker that way.
It probably goes without saying that Worldworks Games produce some of the finest printable terrain suitable for modern settings. I decided to tackle a basic ‘flat’ first, something that would look good on a table but wasn’t going to require too much time to create. I settled on the Mayhem Downtown set and with a ludicrously plentiful supply of foamcore at my disposal I decided to make shells and simply print to paper and ‘skin’ the buildings. To keep cost down I settled on Tesco’s Glue Sticks for the large areas and Power Pritt for the edges and details. I printed and cut out the ‘skins’ first and measured and cut foamcore from those. The shells were glued with PVA and I used a little sellotape to keep them in place whilst drying.
Mayhem Downtown - Beige Brick
The first building worked out ok and only took a couple of hours to build and does the trick although I thought I could do better. For my second building I chose to add a parapet wall and simply cut up some test prints to skin the inside of the parapet wall. Note: I did 'miss' skinning the corners, as in the pics below, but I do plan to go back and fill them in.
Parapet Wall

It is worth noting that most of the Twilight Street range is designed for 20mm scale (although they do produce a ‘Heroic’ scale range), great if that’s your chosen scale but a simple trick for me, wanting 28mm compatibility, was to print to A3 and select ‘fit to page’. A3 is 1.5 times bigger than A4, therefore 20mm x 1.5 = 30mm; it worked out fine and what’s a couple of mm between friends? They are a little on the small size, so I ‘sealed’ the roof of Drakes (a bit too tiny for a full interior), but they add some superb character to the terrain set.  I couldn’t wait to move onto other buildings in both of these retailer’s ranges.
Microtactix Free Download - Drake's


Matt over at ‘Too Much Unpainted Lead’ pointed me in the direction of the Microtactix Twilight Street ranges available through RPG Now. Their superbly evocative models have a more cartoony style that Worldworks but I felt they suited the theme perfectly and would bring some welcome variety to the table. Three Buildings, Drake’s TV and Video, Horseman’s Deli and Stinky’s Pizza, are also all available for free download, result!
Microtactix Free Download - Stinky's Pizza, Yum

Beep Beep; Vrooom!

From the early scenes of Zombieland to the overhead wide shot  at the end of Resident Evil movie it is clear that the post-apocalyptic city streets will be strewn with abandoned vehicles. I considered the card route, a la Worldworks, a fine selection of very superb model vehicles, but I thought I would spend enough time making buildings and I knew there were appropriate die-cast models available and ready to play out of the box. I chose 1/32 as is it the most widely available scale, but as long as it looks and feels right, I am happy. A quick Google search for the right scale ‘genre’ vehicles, i.e. US patrol cars and 70’s era Detroit classics, revealed that ‘perfect’ items were going to come at a price. A quick re-think later and I popped a 28mm model in my pocket and promised myself I would check the toy shops whenever I was in town. I will probably add a few special items once the collection has grown, I mean who wouldn’t want to run a scenario to go fetch an old ’69 Mach 1 under the tarp out of that ramshackle garage as a getaway car?


Sainsburys  provided the most expensive purchase to date, a terrifying £3.99 for a single BMW saloon. It does have opening doors, which has lead to the following pose in almost every game it has appeared in.
 
Classic 'Pull up and get out your guns' pose
Toys R US lead to the awesome discovery that was the Fast-Lane Super Emergency Playset for just £14.99, it is now £9.99, so if it is of interest grab it fast. The only things not usable being the helicopter (too small) and the figures (rubbish), that said, my daughter thought the fireman looked like Captain Mack, so she was happy to take them both off my hands. Probably the coolest item is the fire tuck, with  a huge extending ladder, perfect for re-creating the Maller’s siege from We’re Alive. If you don’t already listen to this incredible podcast please check them out now, well worth a listen.
Tesco provided a superb 3 pack of City Vehicles with detachable cargo for just £5 and Poundland provided three more genuine ‘Me no copy car’ marques which ended up being a little on the large size, but they work fine for ‘background’ vehicles.

The Poundland car (left) is too big but works ok on the periphery
Colin of ‘Down Among the Zed Men’ pointed out my most recent acquisition, which I got the day after I read his post, a ‘Load and Go’ Lorry and forklift set for just £4, smashing. Check out Colin’s reviews here for more details.


I unquestionably do not have enough vehicles yet, especially not enough to re-create a true highway to hell scene. I definitely need plenty more ordinary saloons and and will simply add to the collection piece by piece as and when I find something that fits.

I think I need more regular civilian vehicles


My First Survivors

One of the many things that appealed to me with this project is that fact that I did not have to paint many, many, many, many, and did I say many, miniatures of the exact same pose to be able to play. Sure, there’s that horde of zombies, and who doesn’t aspire to amassing a fully painted horde the size of Vampifan’s? But from a survivor point of view, I knew that I could simply paint up just enough to get started and add to them whenever I felt like it.
I was instantly drawn to Hasslefree Minatures Survivors range. With dynamic poses, an assortment of armaments, a cheeky nod to movie tie-ins and a good mix of male and female characters it seemed difficult to go wrong, so I initially opted to order just four miniatures with different weapons to get the ball rolling.
My survivors of choice were Eve (My other half yelled ‘Oooh, get Lara’), Ray (Shaun), Suzi (You can see her knickers, why wouldn’t you?) and Ken (Kenneth from the 2004 DOTD remake anyone?)
The purchase went smoothly and hand-written note and the sweet made me smile, which was nice; it is good to know the personal touch is not lost, thank you Hasslefree.
I wanted to try a different basing technique and having seen the Tengu Models advice I decided to give milliput a try for the first time and attempt a paving slabs effect. Thank you also to Jim for the pointers. I was pleased with the results however I think I will add a little extra ‘detritus’ and mix elements of milliput, gravel and other scattered randomness to future bases as the project progresses.
Milliput 'flagstone' bases

I think the painting turned out ok however, although the models are playable they are not quite finished, requiring a little more highlighting before they finally get a coat of matt varnish.

Hasslefree Adventurers, almost finished. L-R: Eve, Ray, Ken and Suzi


Scale and Bases and Who's Who is Zed-land

Having decided to create my own little zombie apocalypse in miniature there were a few questions I needed to answer early on. Scale was the easiest decision, a short delve into a dozen boxes of unfinished projects revealed a pack of undercoated Copplestone Plague Zombies (purchased back when they were first released),  a Games Workshop Zombie horde and a few individual other miniatures I suspect might be Ral Partha, but I honestly have no idea. 28mm is my typical scale of choice and the majority of terrain resources for modern gaming seem to be in or around that scale, it seemed the simplest way forward.
Copplestone Y-Z
Basing was a little more complicated. Most of my miniatures are based to an earth brown, dry-brushed with flesh tone/light cream then flocked. This helps them fit onto either of the two gaming boards I generally play on; grassland and desert. Whilst the zombie apocalypse might happen anywhere, we all know that the big city is where it is really at.

Copplestone Plague Zombie
I decided on a standard 25mm round slotta-base, regardless of how the miniature came and a few painting sessions later the first batch of zombies was complete. I settled on a grey to light grey/white dry-brushing on a base of umber. The first batch turned out ok, but I wanted something a little more special for the survivors and it was clear that not only did the bases look a little too ‘rubbley’ the Copplestone miniatures also stood out and choosing manufacturers to add to the set whilst keeping some consistency with so many decent offerings was going to require some thought.
The first finished zombies

Before The Outbreak

As a relative newcomer to the realms of both zombie gaming and blogging it would appear that, for some inexplicable reason, the two seem to sit hand in hand. So without further pause for consideration on the accuracy, or not, of that statement, let us begin. It seems a reasonable step, having begun to immerse myself in the hobby, that seeing as I have benefited so much from so many of the zombie gaming blogs on offer, that I should bite the bullet and join the party. I see it is a rather pleasant way to keep the enthusiasm high, the paintbrushes soft and supple and the xacto blades sharp and if in some way I could give a little something back in the way of inspiration to some of the people who have made me a little giddy and guided me along the way, so much the better.

After many years of tabletop gaming it dawned on me a few years ago that for me, it was all about the play set. The matching play set with everything adding to the experience as a whole; the figures, the terrain, the vehicles, the counters, the dice, even the soundtrack and the T-shirt. So when I decided towards the end of 2010 to combine a life-long love of zombies and tabletop gaming the mission statement was clear; to create the most awesome zombie gaming play set that I was able to. It might not be the best there could be, but it would be the best I could achieve within a reasonable amount of time and maintain a healthy balance of hobby, work and family life. It is currently a work in progress, but it has already seen some play and, most importantly, it gets me excited about the hobby every time I set it up.

My name is Zombie Ad, and this is the beginning of the tale of my zombie gaming play set.

Outbreak City Teaser
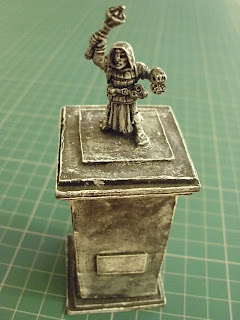
The park statue - As per cmnash's request